Globus
Globus Connect Personal is the latest whizbang tool for moving large data sets between hosts and facilities.
Based on GridFTP, an extension of the older, well-worn FTP, Globus has enhanced features such as parallel streams, increased security, and automatic restart to recover from network and server hiccups.
What this means to the user is faster, more robust transfers of ever-growing data sets. Clients are available for Linux, Windows, and Mac, with the added benefit that you can do it yourself, your grumpy System Administrator doesn't need to get involved.
Globus connect personal
Getting started with Globus Connect Personal. The first thing you will need to do is request an account from Globus.
Follow the link to Globus and click on the Log In option at the top of the page.
After your account is created, go to their download site to get the Globus Connect Personal software for your platform.
Install the client on your system, following the installation instructions on their download site.
Although it's pretty straightforward if you follow the instructions, the one gotcha is that by default it will only see your home directory as an endpoint target. You need to go into the client preferences if you want to add your /project directory or any other directory for your downloads.
Globus Connect
Getting started with Globus Connect. Globus is the leading provider of reasearch data management software and services. One the most essential services provided is data movement support via GridFTP.
The GridFTP protocol is based on FTP, the highly-popular Internet file transfer protocol. GridFTP is a high-performance, secure, reliable data transfer protocol optimized for high-bandwidth wide-area networks.
NCAR/CGD supports our own GridFTP server to enable tranfer of data to our local servers for analysis. Follow the instructions below to get started.
For further information see the Globus FAQ page or continue reading below for instructions.
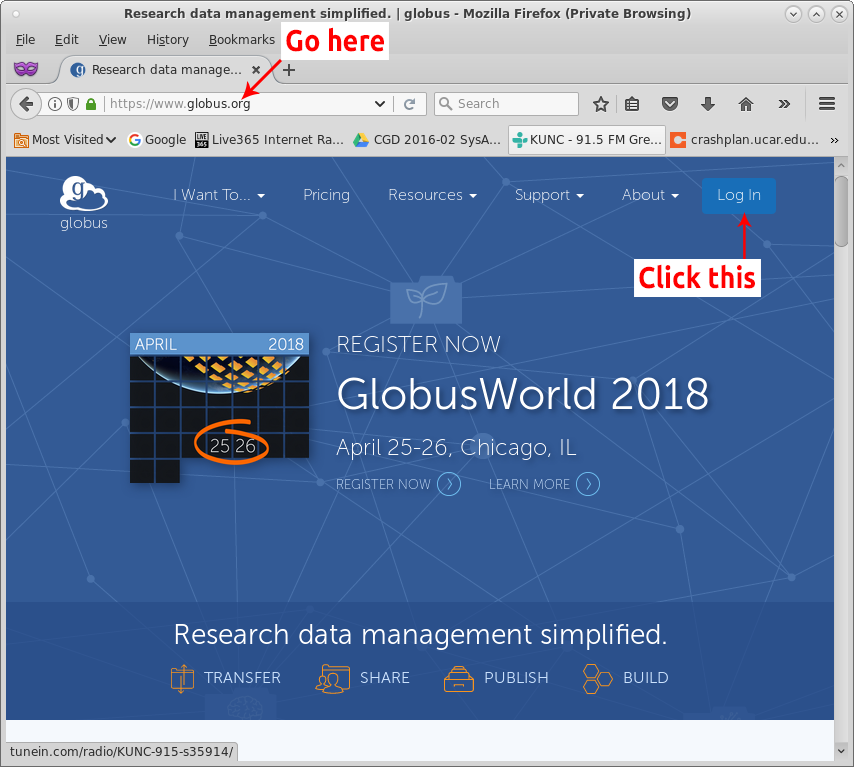
- Open a browser and visit www.globus.org
- Click the Log in button in the top right
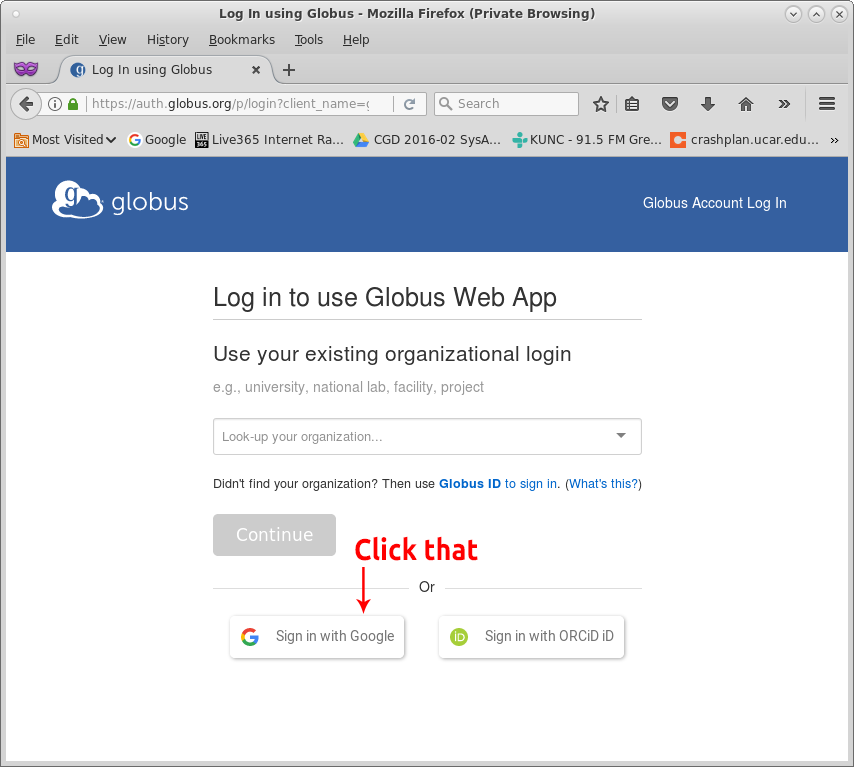
- Click Sign in with Google
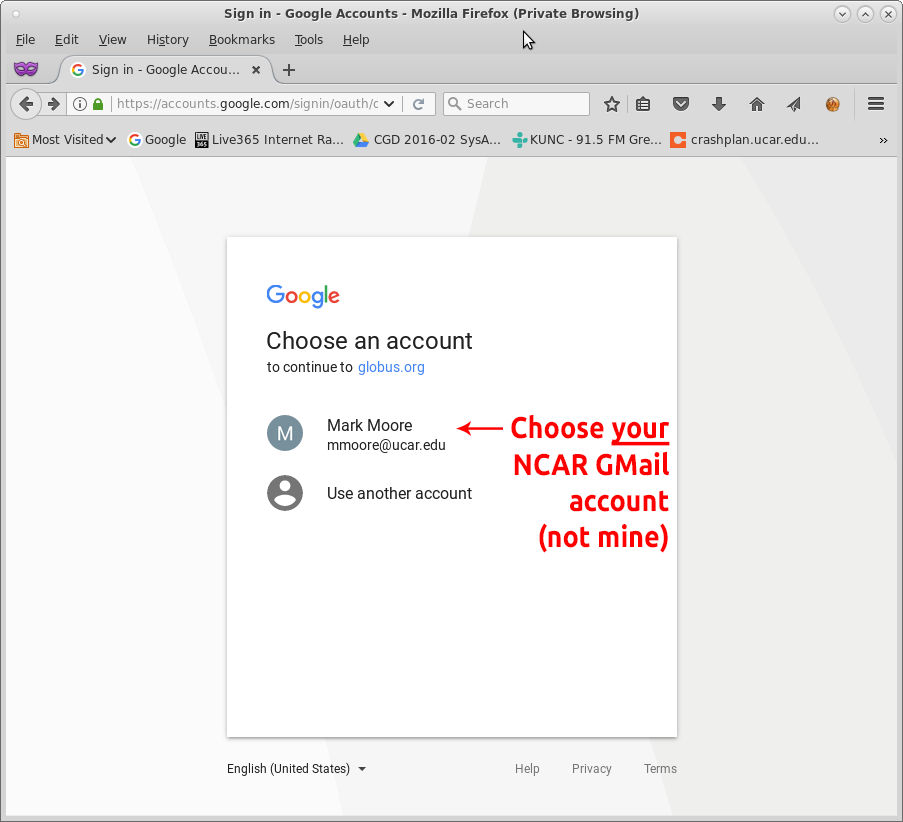
- Select your UCAR Gmail account
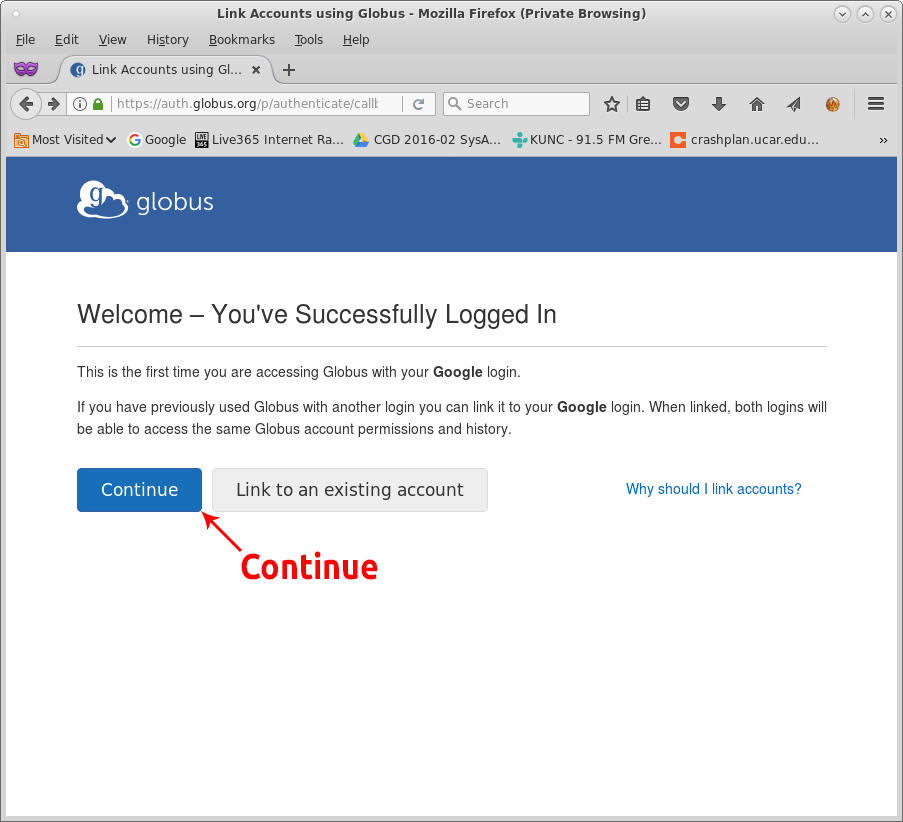
- Click Continue
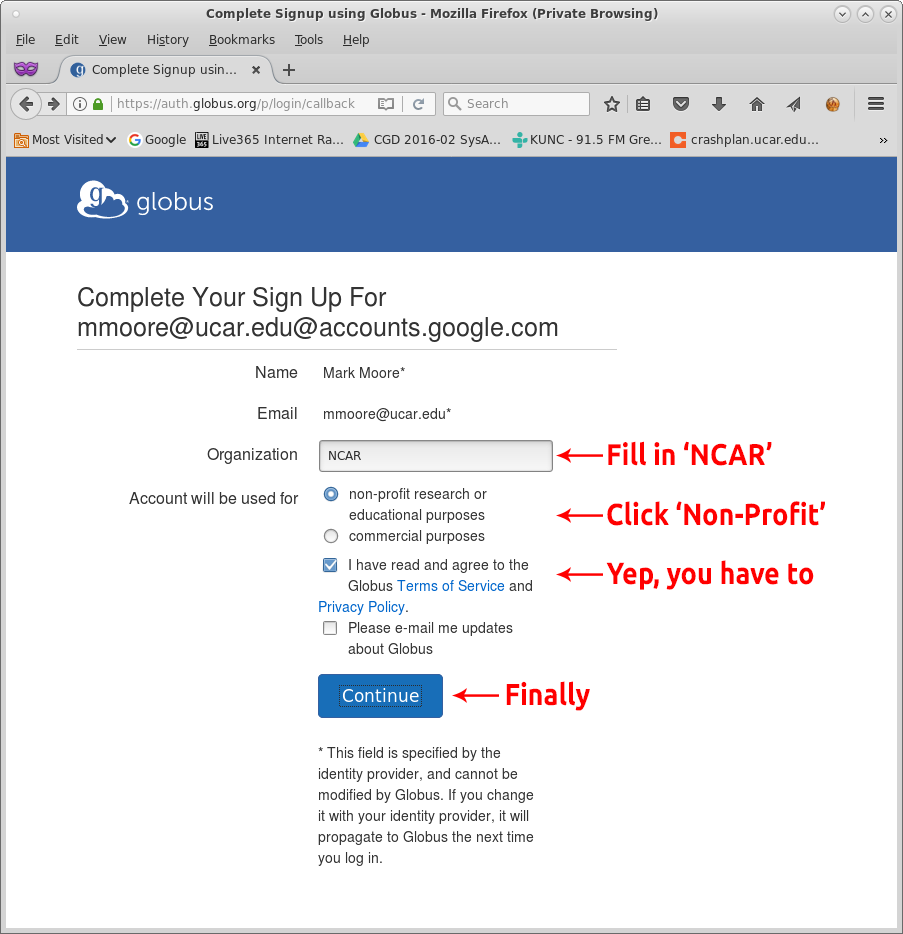
- Fill in NCAR for the organization
- Select non-profit research or educational purpose
- Acknowledge the Terms of service
- Click Continue
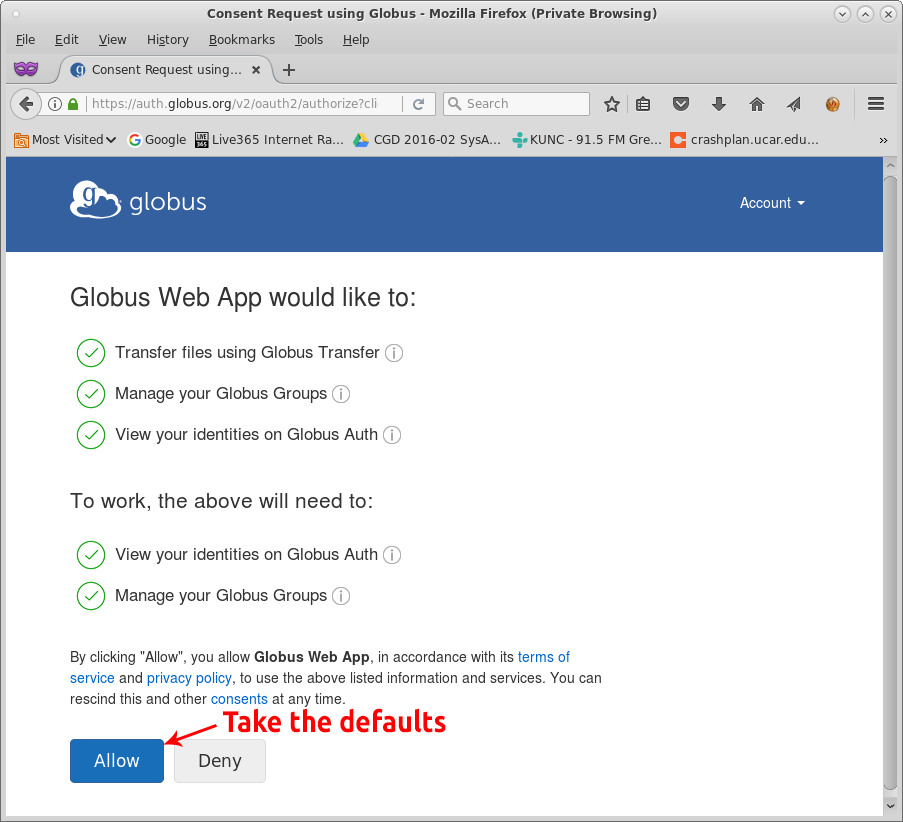
- Click Allow to accept the defaults
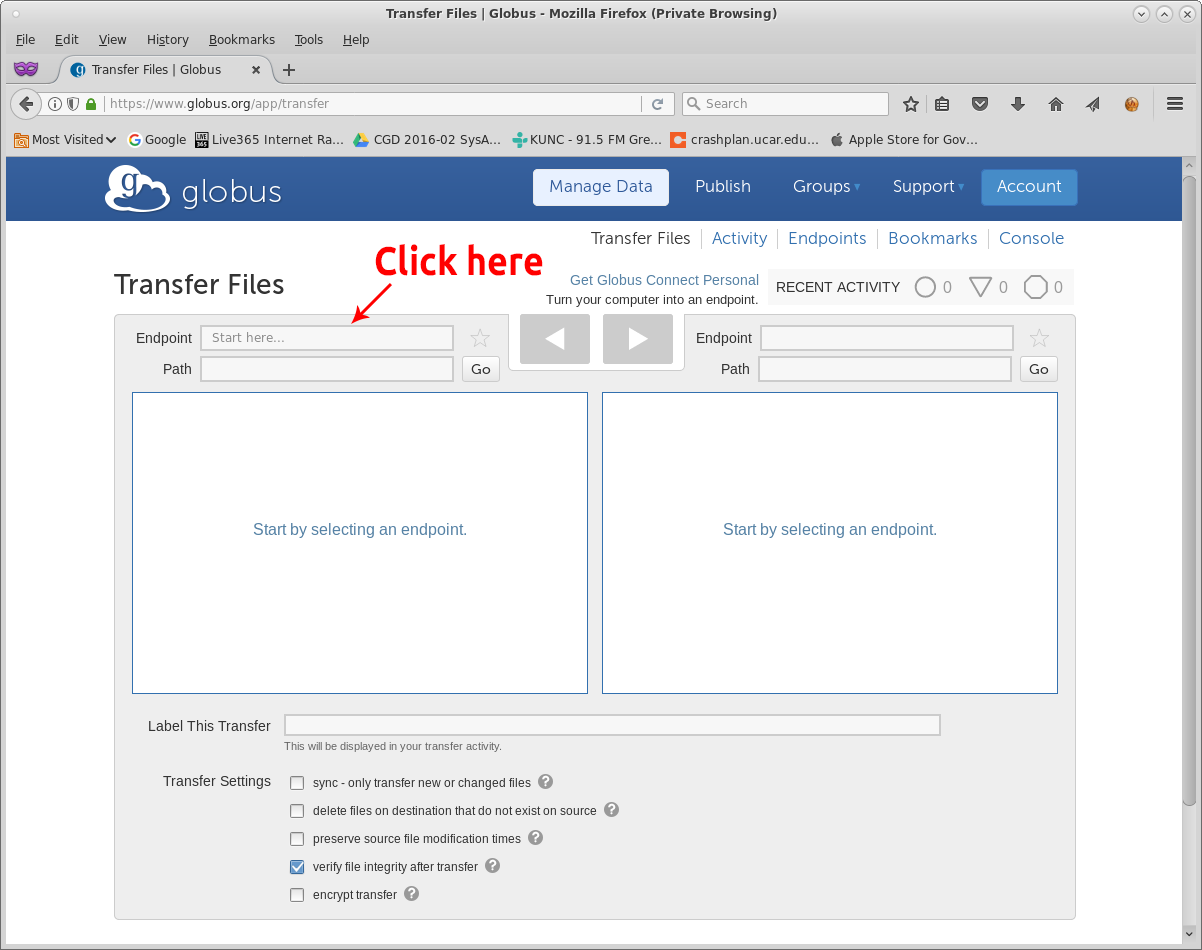
- Click the Endpoint box on the left to setup the first transfer point
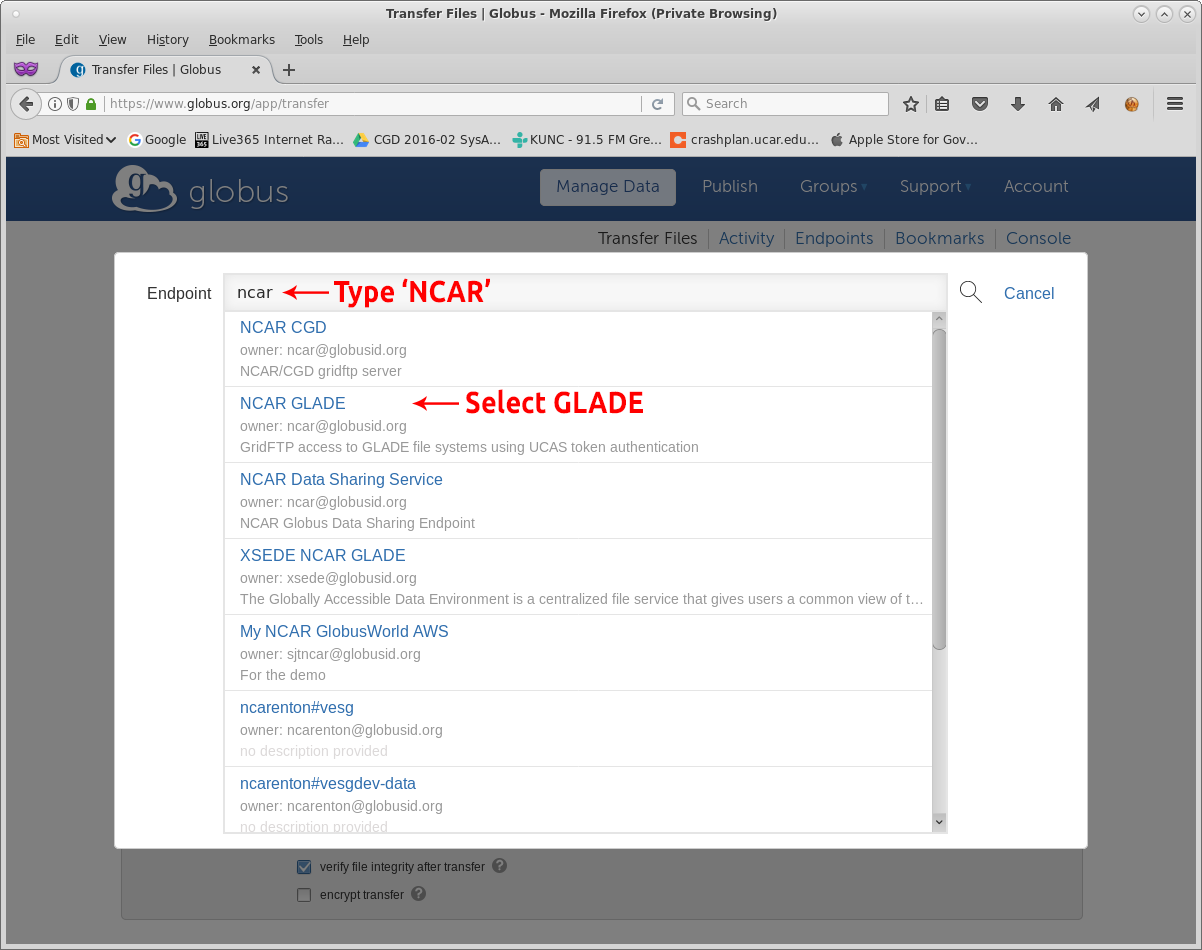
- Enter an organization to bring up a list of available servers, we're assuming NCAR
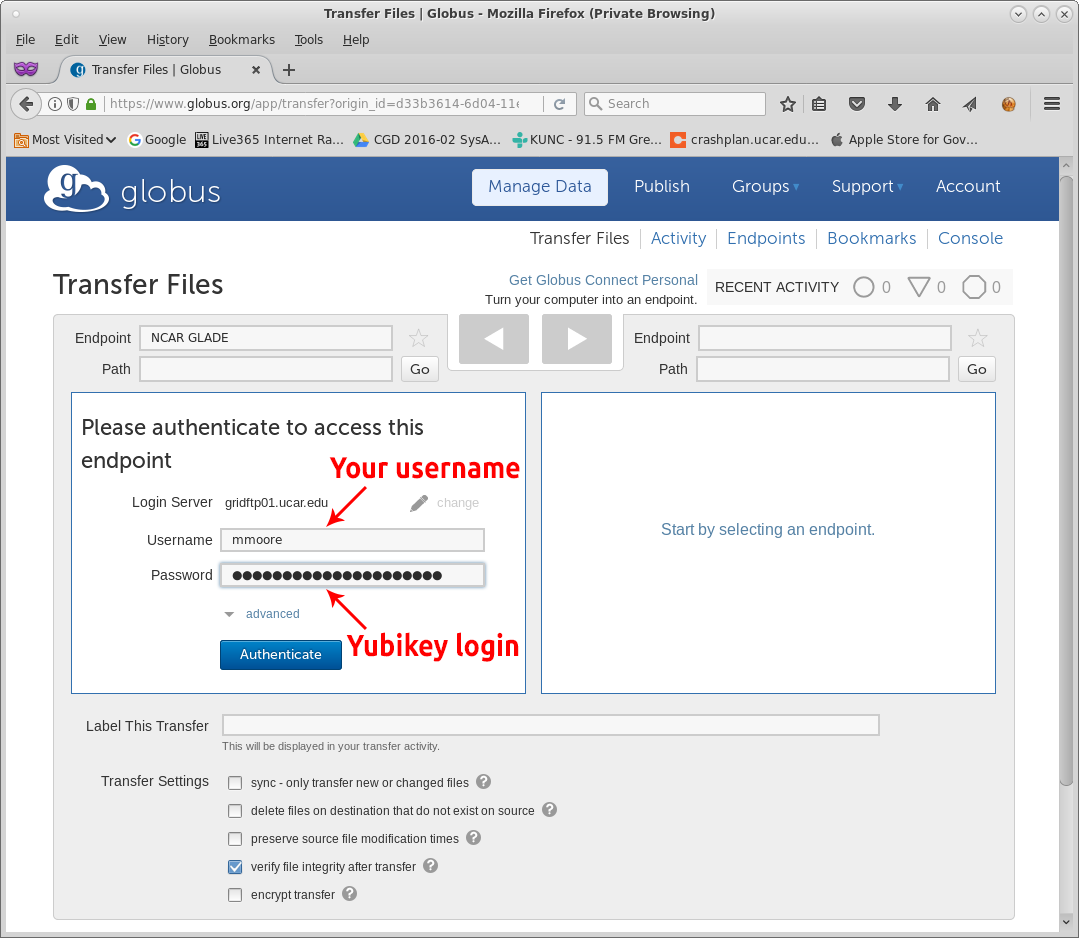
- Select NCAR GLADE for the first endpoint
- Enter your NCAR username
- Authenticate with DUO
- Repeat steps 11 thru 15 for the second transfer point
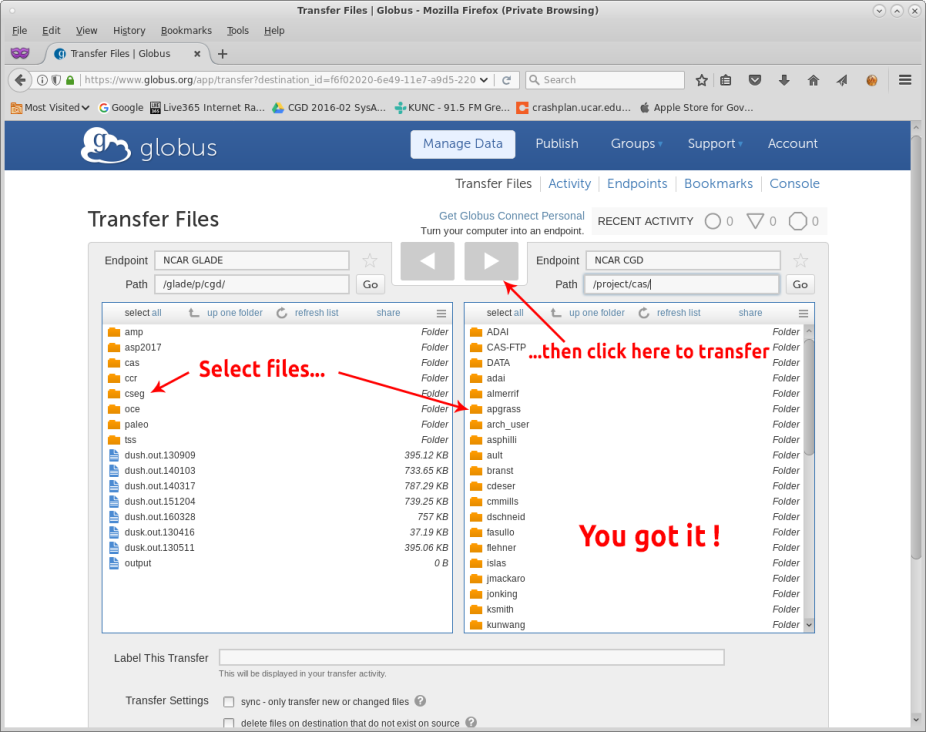
- Navigate the directory structure to select the origination and destination directories
- Select the desired to/from transfer button
Presto!
Status e-mail will be sent when the transfer is either completed (success) or terminated (failure). Active transfer status can be check using the 'Activity' button.
Transferring files